
It’s taken me awhile, but I finally decided to buy Copilot for M365 in my personal tenant recently. I have been exploring all the features I’ve been reading / watching about, but the one that interested me the most, which I am going to talk about in this blog, was the SharePoint Agents. I first read about it in Sara Fennah’s blog where she discusses the same topic / use case.
SharePoint Agents are a game-changer for anyone who uses SharePoint regularly. These AI-powered agents can help streamline workflows, enhance collaboration, and make it easier to find and use the information stored in SharePoint sites and document libraries. What makes them particularly exciting is their ability to act like subject matter experts, providing insights and answers based on the content they have access to.
For example, if you’re working on a project and need a quick summary of all the relevant documents, you can simply ask the SharePoint Agent. It can pull together information from various sources within your SharePoint environment and present it in a concise, easy-to-understand format. This can save you a lot of time and effort, especially when dealing with large volumes of data.
Moreover, if you have edit permissions on a SharePoint site, you can create custom agents tailored to specific tasks or projects. This means you can define the scope of the agent, specify which sites and documents it should access, and even customize its responses to better suit your needs. For instance, a sales manager could create an agent to generate product pitches by pulling information from marketing and R&D documents, ensuring they have the most up-to-date and comprehensive data at their fingertips.
Reading over Sara’s blog reminded me of a project that I was working on recently at Shine with creating a compliance document area so that policies, procedures etc could be found easily for users. I thought I would cover a similar scenario. Where as Sara selected specific documnets to add into the agent, I am going to cover the entire document libary, but the steps are largely the same.
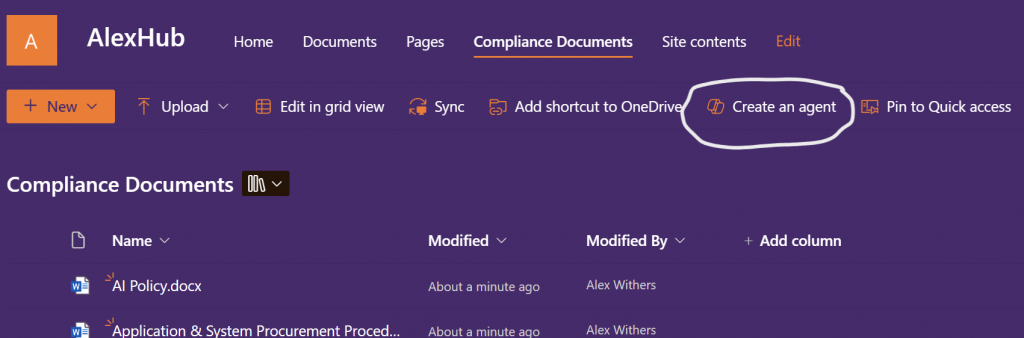
1.Browse to the SharePoint libary you want to have the agent installed on, and select the Create an agent button
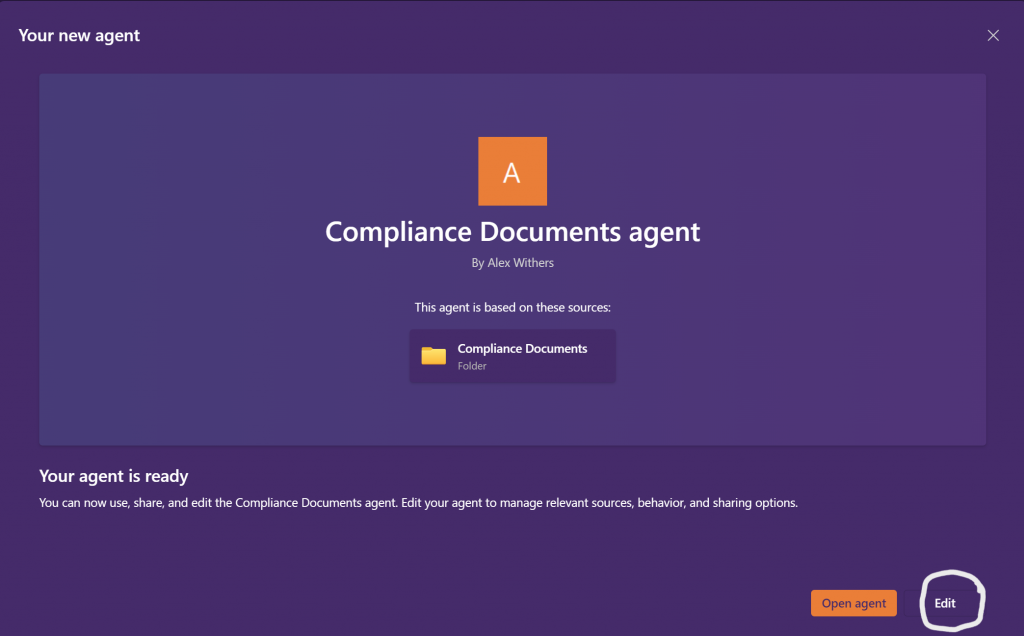
2. This will proceed to create the agent, select edit when the “Your new agent” wizard appears.
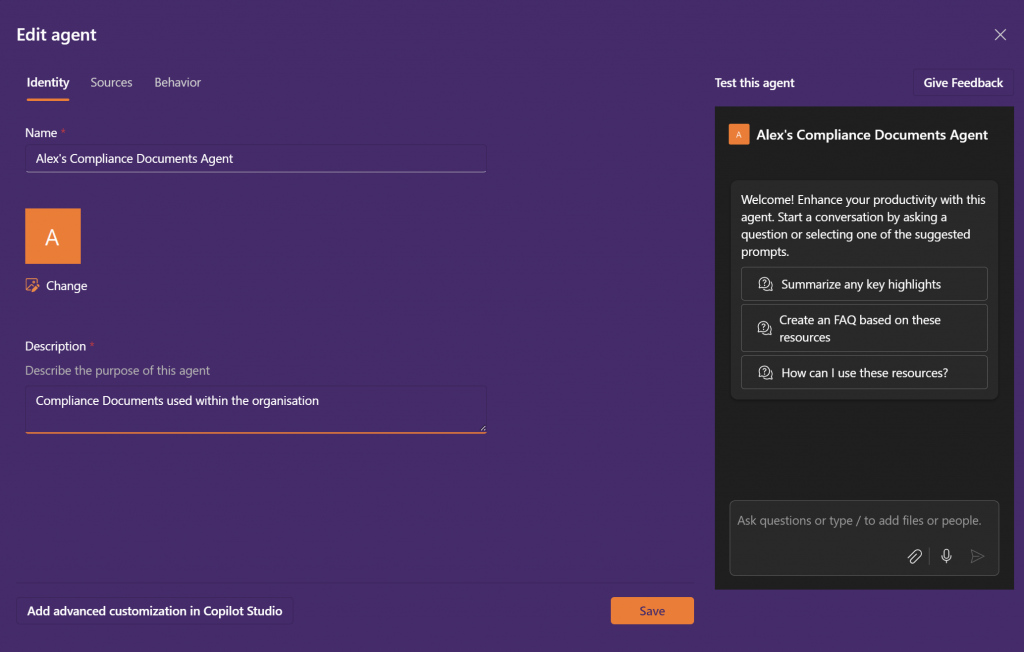
3. In this section you can now customise the agent:
Identity
Name: Enter a customised name for the agent
Image: Select an image symbol for the agent.
Description: Enter a description for the agent, so that users are aware of what it would do.
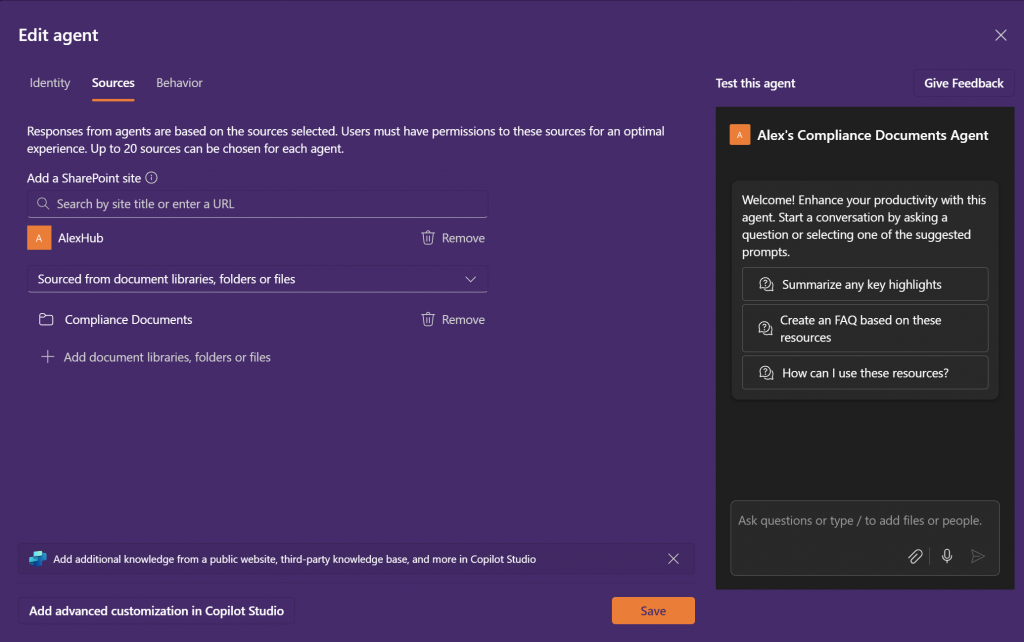
Sources
If you decide you require more sources for the agent, you can select them here.
Behaviour
Welcome messaging: Add a comment for a user when they first open the agent.
Starter prompts: Add starter prompts to help your users get started
Instructions for agent: Describe how the agent should engage with users.
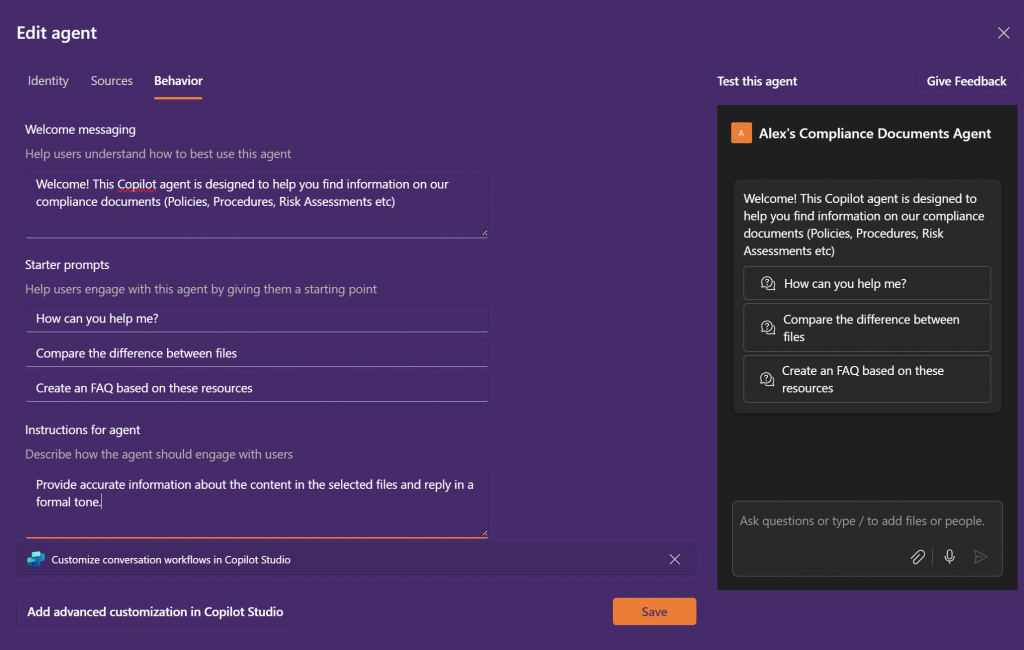
Remember to click “Save” if you need to make any changes, before clicking Save you can test the agent, by asking a question. In my example I asked it the question “How do we ensure our devices remain up to date?”
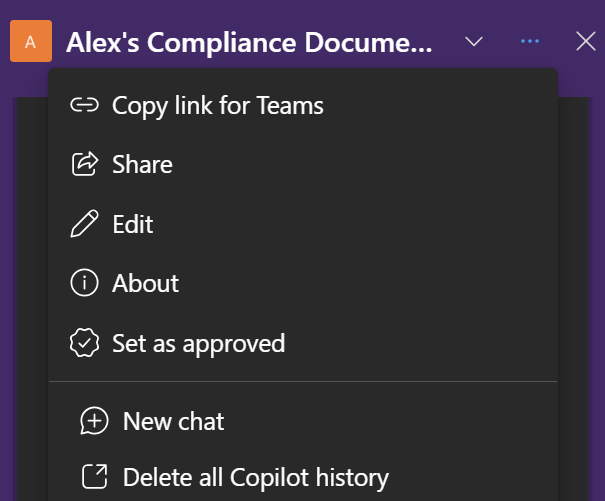
As a site owner, you have the ability to approve agents created by other members on your site. Once approved, these agents will always be accessible from the agent picker for site visitors and can be distinguished from user-recommended agents. To approve an agent, follow these steps:
1. Select the ellipses menu symbol, to the right of the agent name.

2. Select “Set as approved”
3. Select “Set as an approved agent”
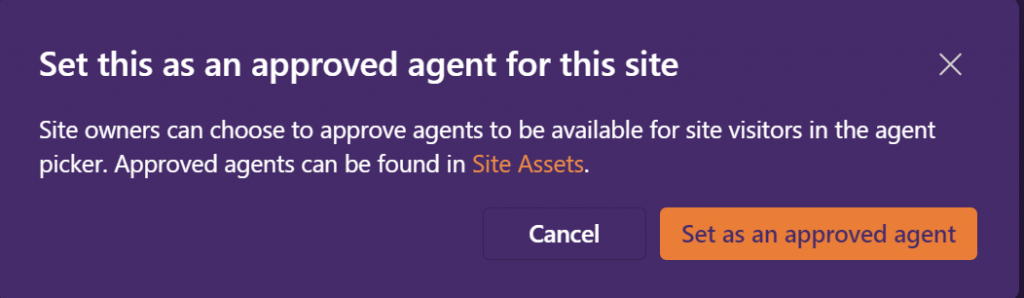
The .agent file will now be moved to the Site Assets location.

Overall, my experience with SharePoint Agents has been very positive, however the one downside is that all your users need to have the Copilot pro license to interact with it, however If you haven’t tried them yet, I highly recommend giving them a go. You might be surprised at how much they can enhance your workflow and productivity.
Comments are closed